So, as I mentioned in my recent article about Google Photos, I’ve recently gotten back into the NextCloud game. My goal here isn’t to replace Google drive and photos, but to give me a second option. An option that I own, and have complete control over. Granted, I don’t have complete control over the direction of the NextCloud project. I do have control over what’s stored there though, and I get to decide it’s fate. Check out the post that started this journey, Untangling my life from Google, for a little back-story there.
I had stood up this instance of NextCloud in order to give me a place to store photos that wouldn’t be scaled down. My wife and I recently bought a nice (or.. nicer than any we’ve ever owned) digital camera, and we’ve started to toy with photography. My solution for photo storage and sharing was Google Photos. There are limitations there when you’re not uploading from a Google smart phone, like my Pixel. The main one being, they scale your images. Granted, it’s not like Facebook, that scales them down to to a horribly low-res in order to save space, but they DO scale. If I’m sharing photos that I’ve taken for their beauty, I don’t want that scaled down unnecessarily.
I run most of my public web apps/sites on a Digital Ocean droplet, inside of containers. So I wanted this to fit right into that. So when I started this endeavor I setup a NextCloud container, with a Collabora Office container, on my CentOS8 host, running in Podman. The problem with that was, all of the NextCloud content was being stored on the local virtual disk attached to the droplet. This was OK, but when I decided to put ALL of my photos into NextCloud, it became obvious that the disk would need to be expanded. Digital Ocean is certainly affordable, which is why I run my stuff there instead of on AWS, but even still, hundreds of GB of attached storage has it’s limitations. Not just cost, which in the grand scheme of things isn’t that much, but it doesn’t expand easily. Planning today would mean allocating a 250GB disk or so, and then waiting for it to get filled up, and adding another, or replacing it with a larger one, later. Come on! We’ve moved past this! We’re living in the future! Right?
Building Nextcloud
So let’s step back for a second. I mentioned that I put NextCloud into a container. Let’s cover that, and then I’ll talk about how I moved the Storage to a bucket. Like I mentioned, I run my web apps in Podman. Nothing fancy, just a single CentOS 8 based Digital Ocean droplet. I’ve thought about moving into a kubernetes cluster, but I haven’t tackled that just yet. I define my web apps as Pods in podman, and then run NGINX on the host itself proxying requests back to the containers. There’s likely a better way to handle that piece, but this is where I am in the journey right now. So I’ll explain how I did it within this infrastructure. If you’re looking to run Primary Storage in a bucket, which is where I ended up, it’d be best if you read the the section of this post that talks about that, and do it from the get-go.
I mentioned Collabora above. If you’re not familiar, Collabora Office is an open source web office suite. It adds collaborative editing to NextCloud. The two together, make a viable contender to Google Docs or Office 365. I’m not going to tell you than you can pitch either of those in favor of NextCloud and Collabaora, but if you’re willing to trade a little fit and polish for complete control of your data, they’re definitely worth looking into!
Local Storage
My DO droplet has a 60gb disk attached in /mnt/docker-storage, which is a carry-over from my last host, which was CentOS 7 running docker. So you’ll see that referenced in my setup whenever I point at local storage.
Define a pod
There’s an official NextCloud image on Docker Hub. This is perfectly compatible with Podman, so that’s what I’ve based my setup on. I expanded on the work I did in my Docker-Compose to Podman Pods article to create a pod definition. You get to benefit from my efforts. This YAML will define a NextCloud container, a Collabora container, and a MariaDB container. It will also map NextCloud’s storage, config, and database storage, to local storage on that mount I mentioned above. Like I mentioned, if your goal is to store Nextcloud’s data in a bucket instead, you can skip that part, and instead add that to the nextcloud config before you finish the initial setup. This could save you a little work in the long run.
So, with all that said, here’s the pod definition:
# Generation of Kubernetes YAML is still under development!
#
# Save the output of this file and use kubectl create -f to import
# it into Kubernetes.
#
# Created with podman-1.6.4
apiVersion: v1
kind: Pod
metadata:
  creationTimestamp: "2020-07-02T20:06:07Z"
  labels:
    app: nextcloud
  name: nextcloud
spec:
  containers:
  - name: collabora
    env:
    - name: extra_params
      value: --o:ssl.enable=false --o:ssl.termination=true
    - name: domain
      value: nextcloud.undrground.org
    image: docker.io/collabora/code:latest
    ports:
    - containerPort: 80
      hostPort: 8087
      protocol: TCP
    - containerPort: 9980
      hostPort: 9980
      protocol: TCP
    resources: {}
    securityContext:
      allowPrivilegeEscalation: true
      capabilities: {}
      privileged: false
      readOnlyRootFilesystem: false
      runAsUser: 101
    workingDir: /
  - name: nextcloud-app
    env:
    - name: MYSQL_HOST
      value: 127.0.0.1
    - name: MYSQL_ROOT_PASSWORD
      value: Some_super_secure_password
    - name: MYSQL_DATABASE
      value: nextcloud
    - name: MYSQL_USER
      value: nextcloud
    - name: MYSQL_PASSWORD
      value: some_user_password_for_nextcloud
    image: docker.io/library/nextcloud:latest
    resources: {}
    securityContext:
      allowPrivilegeEscalation: true
      capabilities: {}
      privileged: false
      readOnlyRootFilesystem: false
    volumeMounts:
    - mountPath: /var/www/html:Z
      name: mnt-docker-data-nextcloud-webroot
    - mountPath: /var/www/html/data:Z
      name: mnt-docker-data-nextcloud-data
    - mountPath: /var/www/html/config:Z
      name: mnt-docker-data-nextcloud-config
    - mountPath: /var/www/html/apps:Z
      name: mnt-docker-data-nextcloud-apps
    workingDir: /var/www/html
  - name: nextcloud-db
    env:
    - name: MYSQL_DATABASE
      value: nextcloud
    - name: MYSQL_USER
      value: nextcloud
    - name: MYSQL_PASSWORD
      value: some_user_password_for_nextcloud
    - name: MYSQL_ROOT_PASSWORD
      value: Some_super_secure_password
    image: docker.io/library/mariadb:latest
    resources: {}
    securityContext:
      allowPrivilegeEscalation: true
      capabilities: {}
      privileged: false
      readOnlyRootFilesystem: false
    volumeMounts:
    - mountPath: /var/lib/mysql:Z
      name: mnt-docker-data-nextcloud-db
    workingDir: /
  volumes:
  - hostPath:
      path: /mnt/docker-data/nextcloud/webroot
      type: Directory
    name: mnt-docker-data-nextcloud-webroot
  - hostPath:
      path: /mnt/docker-data/nextcloud/config
      type: Directory
    name: mnt-docker-data-nextcloud-config
  - hostPath:
      path: /mnt/docker-data/nextcloud/apps
      type: Directory
    name: mnt-docker-data-nextcloud-apps
  - hostPath:
      path: /mnt/docker-data/nextcloud/db
      type: Directory
    name: mnt-docker-data-nextcloud-db
  - hostPath:
      path: /mnt/docker-data/nextcloud/data
      type: Directory
    name: mnt-docker-data-nextcloud-data
status: {}
Now, what that’s SUPPOSED to do is create three containers, NextCloud, Collabora, and MariaDB. It’s supposed to set the passwords and user account for MariaDB, and then pass that along to NextCloud, and build it from the get-go with MariaDB as the back-end. It didn’t work out exactly that way. I have not worked out what exactly I missed, but it seems that the NextCloud container ignored my request to use MariaDB and used the default, which is SQLite. Later I migrated it MariaDB, which is well documented in NextCloud’s online docs. I did not discover this mistake until I’d already started putting data into NextCloud, so I didn’t go back and rebuild the containers to fix it. If someone reading this finds my error, please let me know and I’ll update this post!
Creating the containers, once you have the YAML setup for you environment, is as easy as running:
# podman play kube nextcloud-pod.yamlThis will create your pod and start up your containers. It’s also a good idea, once you have these defined as you’d like them to be, to create a systemd unit to start this pod up at boot time.
# podman generate systemd -f -n nextcloud (or whatever you called your pod)This generates systemd unit files for all of the containers in that pod, you then add them to systemd. I wont go into detail here, as that’s not the goal of this post, but I placed the unit files in /etc/systemd/system, and then enabled and started them all.
Nginx proxy
Now, what that gets us is a locally running pod. If you’re just testing at this point you can point your browser to the port defined in the yaml, on localhost, and you’ll get nextcloud. We’re not done though, if you want this to be accessible. Nextcloud has some decent docs on how to setup your proxy. I also setup Lets Encrypt for my SSL cert, so I’ve included config for a well-known directory for that, AND my collabora container is in here as well.
You can setup nginx however you like. Personally I have a conf.d directory, and I put my upstreams in one config, nextcloud in one, and collabora in another. Here are the relevant pieces:
Upstream:
upstream nextcloud { #nextcloud
  server 127.0.0.1:8087 fail_timeout=10s;
}

upstream nextcloud-c { #collabora
  server 127.0.0.1:9980 fail_timeout=10s;
}
Nextcloud:
server {
  listen       *:80;
  server_name <nextcloud-fqdn>;

  index  index.html index.htm index.php;

  access_log            /var/log/nginx/nextcloud.access.log combined;
  error_log             /var/log/nginx/nextcloud.error.log;

  location /.well-known/ {
      root /var/lib/nginx/nextcloud-wellknown;
    }

  location / {
    rewrite ^(.*) https://<nextcloud-fqdn>$1 permanent;
  #  proxy_pass            http://nextcloud;
  #  proxy_read_timeout    90;
  #  proxy_connect_timeout 90;
  #  proxy_redirect        default;
  #  proxy_set_header      Host $host;
  #  proxy_set_header      X-Real-IP $remote_addr;
  #  proxy_set_header      X-Forwarded-For $proxy_add_x_forwarded_for;
  }
}


  server {
    listen       *:443 ssl;
    server_name  <nextcloud-fqdn>;

    ssl on;
    ssl_dhparam         /etc/nginx/ssl.crt/dhparam.pem;
    ssl_certificate     /etc/letsencrypt/live/<nextcloud-fqdn>/fullchain.pem;
    ssl_certificate_key  /etc/letsencrypt/live/<nextcloud-fqdn>/privkey.pem;
    ssl_session_cache         shared:SSL:10m;
    ssl_session_timeout       5m;
    ssl_protocols             TLSv1 TLSv1.1 TLSv1.2;
    ssl_ciphers               ECDHE-RSA-AES128-GCM-SHA256:ECDHE-ECDSA-AES128-GCM-SHA256:ECDHE-RSA-AES256-GCM-SHA384:ECDHE-ECDSA-AES256-GCM-SHA384:DHE-RSA-AES128-GCM-SHA256:DHE-DSS-AES128-GCM-SHA256:kEDH+AESGCM:ECDHE-RSA-AES128-SHA256:ECDHE-ECDSA-AES128-SHA256:ECDHE-RSA-AES128-SHA:ECDHE-ECDSA-AES128-SHA:ECDHE-RSA-AES256-SHA384:ECDHE-ECDSA-AES256-SHA384:ECDHE-RSA-AES256-SHA:ECDHE-ECDSA-AES256-SHA:DHE-RSA-AES128-SHA256:DHE-RSA-AES128-SHA:DHE-DSS-AES128-SHA256:DHE-RSA-AES256-SHA256:DHE-DSS-AES256-SHA:DHE-RSA-AES256-SHA:AES128-GCM-SHA256:AES256-GCM-SHA384:AES128-SHA256:AES256-SHA256:AES128-SHA:AES256-SHA:AES:CAMELLIA:DES-CBC3-SHA:!aNULL:!eNULL:!EXPORT:!DES:!RC4:!MD5:!PSK:!aECDH:!EDH-DSS-DES-CBC3-SHA:!EDH-RSA-DES-CBC3-SHA:!KRB5-DES-CBC3-SHA;
    ssl_prefer_server_ciphers on;

    index  index.html index.htm index.php;

    access_log            /var/log/nginx/ssl-nextcloud.access.log combined;
    error_log             /var/log/nginx/ssl-nextcloud.error.log;

    location / {

      proxy_pass            http://nextcloud;
      proxy_read_timeout    300;
      proxy_connect_timeout 300;
      proxy_redirect        off;
      proxy_set_header      Host $host;
      proxy_set_header      X-Real-IP $remote_addr;
      proxy_set_header      X-Forwarded-For $proxy_add_x_forwarded_for;
      proxy_set_header      X-Forwarded-Proto https;
    }
  }
Of course, replace the FQDN with your own, and setup your own SSL Certificates.
And finally collabora:
server {
  listen       *:80;
  server_name <collabora-fqdn>;

  index  index.html index.htm index.php;

  access_log            /var/log/nginx/collabora.access.log combined;
  error_log             /var/log/nginx/collabora.error.log;

  location /.well-known/ {
      root /var/lib/nginx/collabora-wellknown;
    }

  location / {
    rewrite ^(.*) https://collabora.undrground.org$1 permanent;
    $proxy_add_x_forwarded_for;
  }
}


  server {
    listen       *:443 ssl;
    server_name  <collabora-fqdn>;

    ssl on;
    ssl_dhparam         /etc/nginx/ssl.crt/dhparam.pem;
    ssl_certificate     /etc/letsencrypt/live/<collabora-fqdn>/fullchain.pem;
    ssl_certificate_key  /etc/letsencrypt/live/<collabora-fqdn>/privkey.pem;
    ssl_session_cache         shared:SSL:10m;
    ssl_session_timeout       5m;
    ssl_protocols             TLSv1 TLSv1.1 TLSv1.2;
    ssl_ciphers               ECDHE-RSA-AES128-GCM-SHA256:ECDHE-ECDSA-AES128-GCM-SHA256:ECDHE-RSA-AES256-GCM-SHA384:ECDHE-ECDSA-AES256-GCM-SHA384:DHE-RSA-AES128-GCM-SHA256:DHE-DSS-AES128-GCM-SHA256:kEDH+AESGCM:ECDHE-RSA-AES128-SHA256:ECDHE-ECDSA-AES128-SHA256:ECDHE-RSA-AES128-SHA:ECDHE-ECDSA-AES128-SHA:ECDHE-RSA-AES256-SHA384:ECDHE-ECDSA-AES256-SHA384:ECDHE-RSA-AES256-SHA:ECDHE-ECDSA-AES256-SHA:DHE-RSA-AES128-SHA256:DHE-RSA-AES128-SHA:DHE-DSS-AES128-SHA256:DHE-RSA-AES256-SHA256:DHE-DSS-AES256-SHA:DHE-RSA-AES256-SHA:AES128-GCM-SHA256:AES256-GCM-SHA384:AES128-SHA256:AES256-SHA256:AES128-SHA:AES256-SHA:AES:CAMELLIA:DES-CBC3-SHA:!aNULL:!eNULL:!EXPORT:!DES:!RC4:!MD5:!PSK:!aECDH:!EDH-DSS-DES-CBC3-SHA:!EDH-RSA-DES-CBC3-SHA:!KRB5-DES-CBC3-SHA;
    ssl_prefer_server_ciphers on;

    index  index.html index.htm index.php;

    access_log            /var/log/nginx/ssl-collabora.access.log combined;
    error_log             /var/log/nginx/ssl-collabora.error.log;

    ## collabora specific
    # static files
    location ^~ /loleaflet {
        proxy_pass http://nextcloud-c;
        proxy_set_header Host $http_host;
    }

    # WOPI discovery URL
    location ^~ /hosting/discovery {
        proxy_pass http://nextcloud-c;
        proxy_set_header Host $http_host;
    }

    # Capabilities
    location ^~ /hosting/capabilities {
        proxy_pass http://nextcloud-c;
        proxy_set_header Host $http_host;
    }

    # main websocket
    location ~ ^/lool/(.*)/ws$ {
        proxy_pass http://nextcloud-c;
        proxy_set_header Upgrade $http_upgrade;
        proxy_set_header Connection "Upgrade";
        proxy_set_header Host $http_host;
        proxy_read_timeout 36000s;
    }

    # download, presentation and image upload
    location ~ ^/lool {
        proxy_pass http://nextcloud-c;
        proxy_set_header Host $http_host;
    }

    # Admin Console websocket
    location ^~ /lool/adminws {
        proxy_pass http://nextcloud-c;
        proxy_set_header Upgrade $http_upgrade;
        proxy_set_header Connection "Upgrade";
        proxy_set_header Host $http_host;
        proxy_read_timeout 36000s;
    }
    ## End Collabora


    location / {

      proxy_pass            http://nextcloud-c;
      proxy_read_timeout    90;
      proxy_connect_timeout 90;
      proxy_redirect        off;
      proxy_set_header      Host $host;
      proxy_set_header      X-Real-IP $remote_addr;
      proxy_set_header      X-Forwarded-For $proxy_add_x_forwarded_for;
      proxy_set_header      X-Forwarded-Proto https;
    }
  }
There’s a bunch of config in there for things like websockets, which took me some time to work out. You’re welcome. 😉
Now, as mentioned in the Nextcloud proxying doc, you need to add your trusted domains and trusted proxies to your nextcloud config.php, which should be located at the path you defined in your pod definition. I also found the overwriteprotocol to be required later. May as well add it now.
  'trusted_domains' =>
  array (
    0 => 'nextcloud-fqdn',
  ),
  'trusted_proxies' => '127.0.0.1',
  'overwriteprotocol' => 'https',
Enabling Collabora
Collabora is enabled as a plugin for NextCloud. Now you’ll need to go to your nextcloud app and setup your admin account. It should take you into a setup wizard to do this. It’s been a while since I did this, so bear with me, but you’ll want to login as the admin account once it’s setup. Then enable to App “Collabora Online”. It will default to using the internal “Collabora CODE” instance of Collabora which in my experience, simply did not work. We’ve setup a Collabora Office container though, so let’s point it there! As the admin, open up the NextClod settings page, and you’ll have a heading called Administration. In there you can configure all of your apps. Find Collabora Online, and open it’s config. You should have two radio-buttons, one for the integrated CODE instance, and the other for your own server. Just switch it, and enter the FQDN of the collabora nginx entry we just setup.

And that should be that! You should get that nice green check-mark if Nextcloud is able to talk to Collabora.
S3 Primary Storage
Now, part of my point here is to show you how to setup S3 storage. I’ll spare you the long story, but first I tried to use External storage just for a Photos directory inside of my Nextcloud structure. This did not work well. I don’t recommend it. I wanted to use Digital Ocean’s spaces, and coupling that was external storage was… Pretty bad. AWS S3 was better, but had a little glitch where I could write to the bucket from NextCloud, but couldn’t delete? It was weird. While trying to figure that out, I came across a post where someone said they’d used S3 as primary storage, and got around the deletion problem! So I dug into that a bit, and found this in the Nextcloud docs! Basically, you can add some config to the NextCloud config.php to configure object storage as your primary NextCloud storage. This means the volume that we added above to podman for data could be omitted from the config, and NextCloud would instead write directly to S3.
In my case, I wanted to use Digital Ocean’s spaces, which is an S3 compatible object store right on DO. It took a little doing, but I did manage to get it to work. Here’s what I added to my NextCloud config.php:
  'objectstore' => array(
        'class' => '\\OC\\Files\\ObjectStore\\S3',
        'arguments' => array(
                'bucket' => 'your-do-spaces-name',
                'key'    => 'your-do-spaces-key',
                'secret' => 'your-do-spaces-secret',
                'hostname' => 'your-do-region.digitaloceanspaces.com',
                'port' => 443,
                'use_ssl' => true,
                'region' => 'nyc3',
                // required for some non Amazon S3 implementations
                'use_path_style'=>true
        ),
  ),
Once you save the config, the changes are immediate. If you had already started using NextCloud (as I did) you’ll lose access to anythign you’d stored in NextCloud after you add this. In my case, I just went to my local data storage path on my container host, and copied the data I wanted. I ended up downloading it to my workstation, and then uploading it back to NextCloud.
Nextcloud Config Overview
I realize we made quite a few changes to the config.php here, and I wanted to give you some context. The config file is essentially a php array, so where you put things matters. Here’s what my config.php ended up looking like:
<?php
$CONFIG = array (
  'instanceid' => '<nextcloud generated instance id>',
  'passwordsalt' => '<nextcloud generated PW salt>',
  'secret' => '<nextcloud generated secret>',
  'trusted_domains' =>
  array (
    0 => '<my nextcloud fqdn>',
  ),
  'datadirectory' => '/var/www/html/data',
  'dbtype' => 'mysql',
  'version' => '19.0.0.12',
  'overwrite.cli.url' => 'http://<my nextcloud fqdn>',
  'installed' => true,
  'updater.secret' => 'nextcloud generated secret',
  'maintenance' => false,
  'dbname' => 'nextcloud',
  'dbhost' => '127.0.0.1',
  'dbuser' => 'nextcloud',
  'dbpassword' => 'nextcloud mysql user password',
  'trusted_proxies' => '127.0.0.1',
  'overwriteprotocol' => 'https',
  'objectstore' => array(
        'class' => '\\OC\\Files\\ObjectStore\\S3',
        'arguments' => array(
                'bucket' => 'my-do-spaces-name',
                'key'    => 'my-do-spaces-key',
                'secret' => 'my-do-spaces-secret',
                'hostname' => 'my-do-region.digitaloceanspaces.com',
                'port' => 443,
                'use_ssl' => true,
                'region' => 'nyc3',
                // required for some non Amazon S3 implementations
                'use_path_style'=>true
        ),
  ),
);
Getting your data into NextCloud
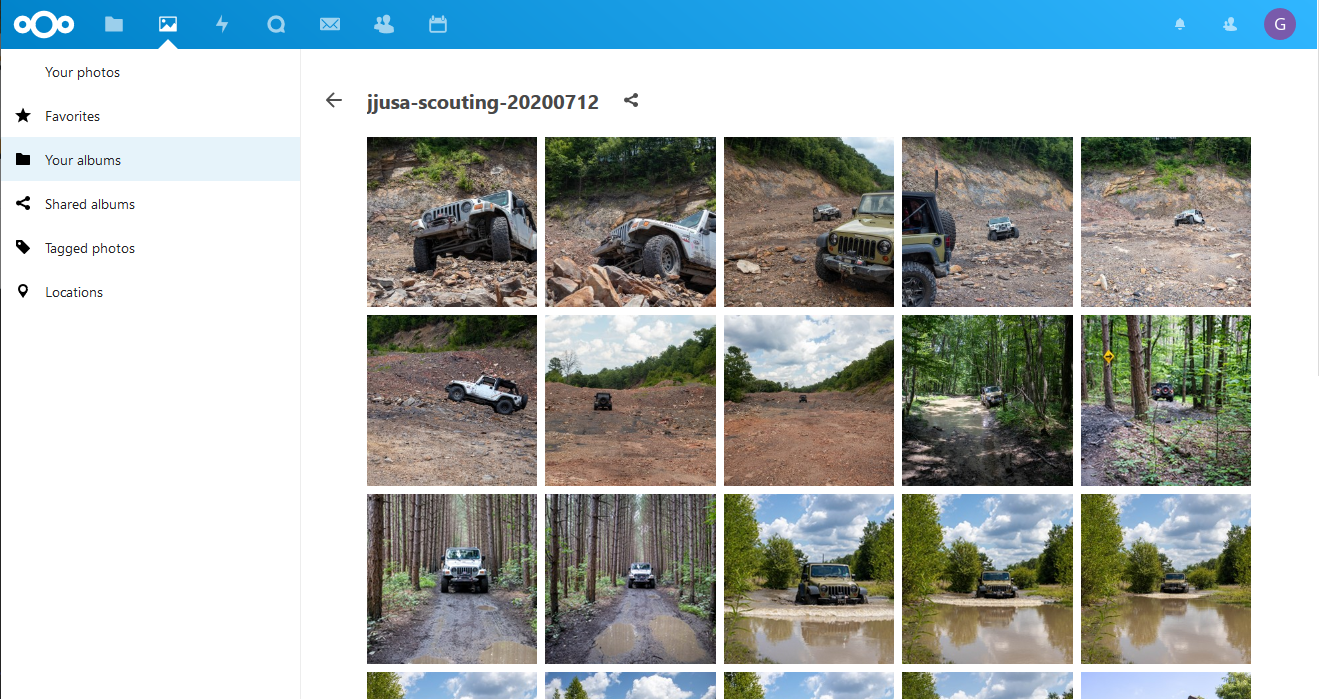
As I mentioned in my Google Photos entry. I had quite a few images to upload to NextCloud after I exported them from Google Photos. First, I gave the object store a test by just opening up the NextCloud web UI, and dragging a few folders right into NextCloud. This worked! Flawlessly! No timeouts, or failed uploads. I put a number of folders in place this way until I felt comfortable that the storage back-end was working properly. I’d run into so many timeouts with DO Spaces when using the external storage driver that I was really gun-shy here. Once I was convinced that it was working, I setup the NextCloud Sync app on my workstation, and set it up to only sync the top-level folder of my Photos folder. This way it wouldn’t sync all of the content I’d already uploaded back down to my laptop. Once that was setup, and working, I drug a few photo folders from my Google Takeout, into the sync’d Photos folder on my laptop, and they all uploaded clean! So, not wanting to belabor this any further, I took _all_ of the photo albums I wanted to upload to NextCloud and drug them into my sync’d Photos folder. After about a day they’d all uploaded!
Once everything had uploaded, I just went back into the Sync config, and un-checked all of the folders I’d just uploaded. The NextCloud client removed them from my laptop, keeping them just on the NextCloud server. Which really is exactly what I wanted. Now if I have a pile of Photos to import, I just throw them into that Sync folder, and they upload in the background! WIN!
A note on the object store
Something to note! When you store files in nextcloud on local disk storage, you end up with a very easy to navigate (and.. back-up) directory structure on your NextCloud server. You can find any user’s data and inside of that you’ll find a literal directory structure of their files. Of course with NextCloud encryption enabled that’s not as straight forward, but we didn’t set that up here.
Likewise, with S3 as external storage, your S3 bucket ends up with files and folders stored in a very human-readable way. Which could make it easy to add/remove files programatically without having to even log into NextCloud.
When using the Object Store as primary storage though… Everything is written to the bucket with some manner of ID, which must then correlate back to the NextCloud database. In my Digital Ocean Space, I couldn’t identify any of the files I’ve uploaded. So if this is a concern for you, be aware that this is how this works. Without your NextCloud database, this data _may_ be un-usable. I have not dove into that just yet.
Wrap-up
In the end, I’m really happy with how this worked out. I have not used it for collaborative document editing or anything, but for what I was looking for, Photo storage with the ability to share, it’s been working awesome. I love the fact that this is backed by an object store that I should never need to expand. This also makes this whole configuration that much more kubernetes friendly, as there’s one less bit of mapped in storage to worry about.
So, I hope this has been informative! Happy Next-Clouding!
[…] Nextcloud, in a container, in a bucket […]